Tag Archive: pad shape

  1. Tech Tip Tuesdays: Frequently Asked Pad Printing Pad Questions?

    Comments Off on Tech Tip Tuesdays: Frequently Asked Pad Printing Pad Questions?

    How long should my pad printing pad last?
    Depending on how “rugged” a surface you’re printing on, a pad should last between 50,000 and 100,000 impressions. Improper use, careless machine operation or stray grit however, can decrease the pad’s life.

    What should i watch for when I’m pad printing?
    Make sure your substrate is free of sharp particles and debris. Avoid printing on sharp edges, which can puncture the pad. Use as little pad pressure (downstroke) as you can to pick up and deposit your image. (Tip: Too light an image could be an improperly etched cliche’)

    What causes the most damage to pads?
    Overly aggressive solvents, mechanical damage, poor storage practices, dirt/dust/debris and careless use are the most common causes of damage to pads. Additionally, some inks have aggressive solvents as part of their mix that will be absorbed by the pad and cause the image to “spread” on the pad. This isn’t permanent, as the solvent will evaporate if warmed or left to stand.

    How should I clean my pad?
    The best way to remove ink and debris from your pad surface is with regular packing tape. You may also use a mild solvent, such as alcohol. Always clean your pad before starting a printing job and never use a sharp object on your pad.

    What is the best way to store my pad?
    If a pad arrives in a protective shell or with a protective cover, remove it and do not reuse. It could trap grit and debris that can damage the pad. Never store a pad on top of or compressed against another pad. Handle and store your pads carefully.

    What’s the nest way to extend my pad’s life?
    We sell 8 oz. bottles of Pad Rejuvenator (Ask for Part Number PAD OIL when you call our customer service department.) The other way we recommend extending a pad’s life is to have two pads that you alternate one shift on, one shift off, to “rest” the pad and let it restore to its uncompressed state.

    How do I prevent pad wear?
    Correct design and tooling of fixtures will help eliminate pad wear … a major cause of image distortion.


  2. Tech Tip Tuesday: Symptoms of Having Chosen the Incorrect Pad Printing Pad

    Comments Off on Tech Tip Tuesday: Symptoms of Having Chosen the Incorrect Pad Printing Pad

    The pad is one of the most important elements in the pad printing process. The correct choice is essential in obtaining good final print results.

    Symptoms of having chosen the incorrect pad printing pad:

    1. Pin holing (pad too soft or too shallow),
    2. Image distortion,
    3. Incomplete transfer (in particular near the peak of the pad),
    4. Inability to pickup entire image (pad too small),
    5. Will not fit on equipment,
    6. Equipment incapable of compressing pad sufficiently for pickup, transfer or both.

    Choosing the correct pad requires some familiarity with the pad print process.  General rule of thumb:

    1. Choose as hard a pad as the process will allow.
    2. Keep the image size to no more than 80% of the print area of a given pad.
    3. When odd form printing … use a large a pad (within reason) as is possible.

    Our customer service team will help you choose the proper pad for your printing application. Some of the questions we will ask (in addition to print area, shape and surface texture) are:

    1. Thickness of the base (1/2″, 3/4″, etc.);
    2. Type of base needed (wooden is standard, or specify flat aluminum or extruded aluminum dovetail);
    3. Machining or drilling needed on base (size and location of tap holes);
    4. Overall maximum pad height, including the base;
    5. Whether the pad needs to be hollow of with a helicoil insert;
    6. How hard or soft the item is being printed (to determine pad durometer);
    7. The size “T” nut needed to attach pad to machine (if needed).
  3. Pad Printing in Multiples

    Comments Off on Pad Printing in Multiples

    Compared to the world of manual pad printing, the world of automation is virtually unlimited, within reason. Here at Engineered Printing Solutions we have taken a standard KP05 bench mounted printer and stripped it of the software and hardware. We then completely customized it to be able to produce 8,000 pieces per hour, all the while requiring minimal operator involvement.  How do you decide if automation is right for you? Well you need to ask yourself 3 questions: How many pieces per hour do you need to print? How many colors on the image? Finally what is the size of the image? With this machine, it all starts with the Bowl Feeder which aligns the parts all the same direction and feeds them down a track to the printer, printing the parts and finishing with the items going out under an infrared heater, ensuring that the images are dry enough to continue down the production line to other operations or to packaging. However with every innovation there are obstacles which we must work through.

    YouTube player

    Some of the technical problems that can arise are:

    • Being able to efficiently feed the parts to keep up with the printer.
    • Printing multiple images in one pad stroke can create some undesirable results. This may require custom pads.
    • Being able to efficiently process parts through the system without damaging even the most delicate part.
    • Ensuring that the printed image is dry enough to withstand downstream operations as soon as it leaves the system.

    In this case we are printing 8 pieces at a time so our engineers need to make sure that the images are being placed correctly on each of the 8 parts every time.

    For information about Engineered Printing Solutions custom solutions, standard pad printers, industrial digital ink jet, consumables and other auxiliary equipment, visit Ink Adhesion Part 3: Ink Mixing, Contamination, Blooming and Mold Release Agents, email sales@www.epsvt.com or call 1-800-272-7764

  4. Pad Printing Pads: Is Pad Size Important?

    Comments Off on Pad Printing Pads: Is Pad Size Important?

    Size minimizes distortion
    Pad for a Pad Printing MachineAn important variable to consider in quality pad printing is the pad size, especially as it relates to the image size. In pad printing, the larger the pad size used, the less the image is likely to distort in the printing process.
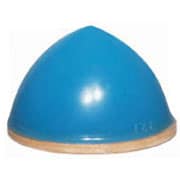
    • Pad size is measured in length, width and height without the base.
    • As a general rule, your pad should measure 10% to 20% larger than the image’s length and width.
    • Remember the “throat” – or the distance between the cliché and the body of the machine – often determines the maximum pad size you can use.


    Special pad printing pads for large images
    In some situations, a large image area must be printed and the machine does not have the power to compress such a heavy pad in a smooth motion.

    Cylindrical pad for Pad Printing MachinesTwo solutions to this problem are available:

    • The first is to use a pad with a hollow interior that provides the same surface hardness. The hollow interior also reduces the cost of silicone rubber used in a large pad.
    • The second option is a dual-hardness pad, where the core of the pad is made of a softer material and the outer layer is the harder rubber. Either method helps, but using dual-hardness allows for a more stable pad.
    • Of course a third option would be to use a different imaging process like screen printing.
    • There’s another unusual pad configuration that is like an inflated pig bladder. Specialized machines use hollow pads inflated with air just prior to ink pick-up. The pad stays inflated until it comes into contact with the substrate. Then the air is released. The deflated pad can conform to a wider area of the substrate, printing up to 180 degrees compared to 100 degrees with a standard pad on a cylinder or sphere.

    Join the Conversation! Have you had problems with print distortion or image size? Click Cylindrical Printing Pads or call us at 800-272-7764 for our suggestions on pad size usage. We love your challenges!